Agent Workflows provide an efficient solution to one of the most pressing challenges faced by businesses today – Automating the business processes that usually require knowledge workers to put relentless hours on repetitive tasks. This can be solved by using Agent Workflows, which allow agents to autonomously execute repetitive tasks, reduce errors & scale operations. This allows knowledge workers to focus on more creative tasks and solve complex problems, which can eventually improve the overall organization’s operational efficiency.
Understanding Agent Workflows
Agent Workflows are a pre-defined set of ReAct LLM architecture steps that an AI agent can execute in a loop and autonomously iterate each step using LLM. Existing business operation playbooks can be translated into Agent workflows – allowing AI agents to execute these tasks and run on auto-pilot.
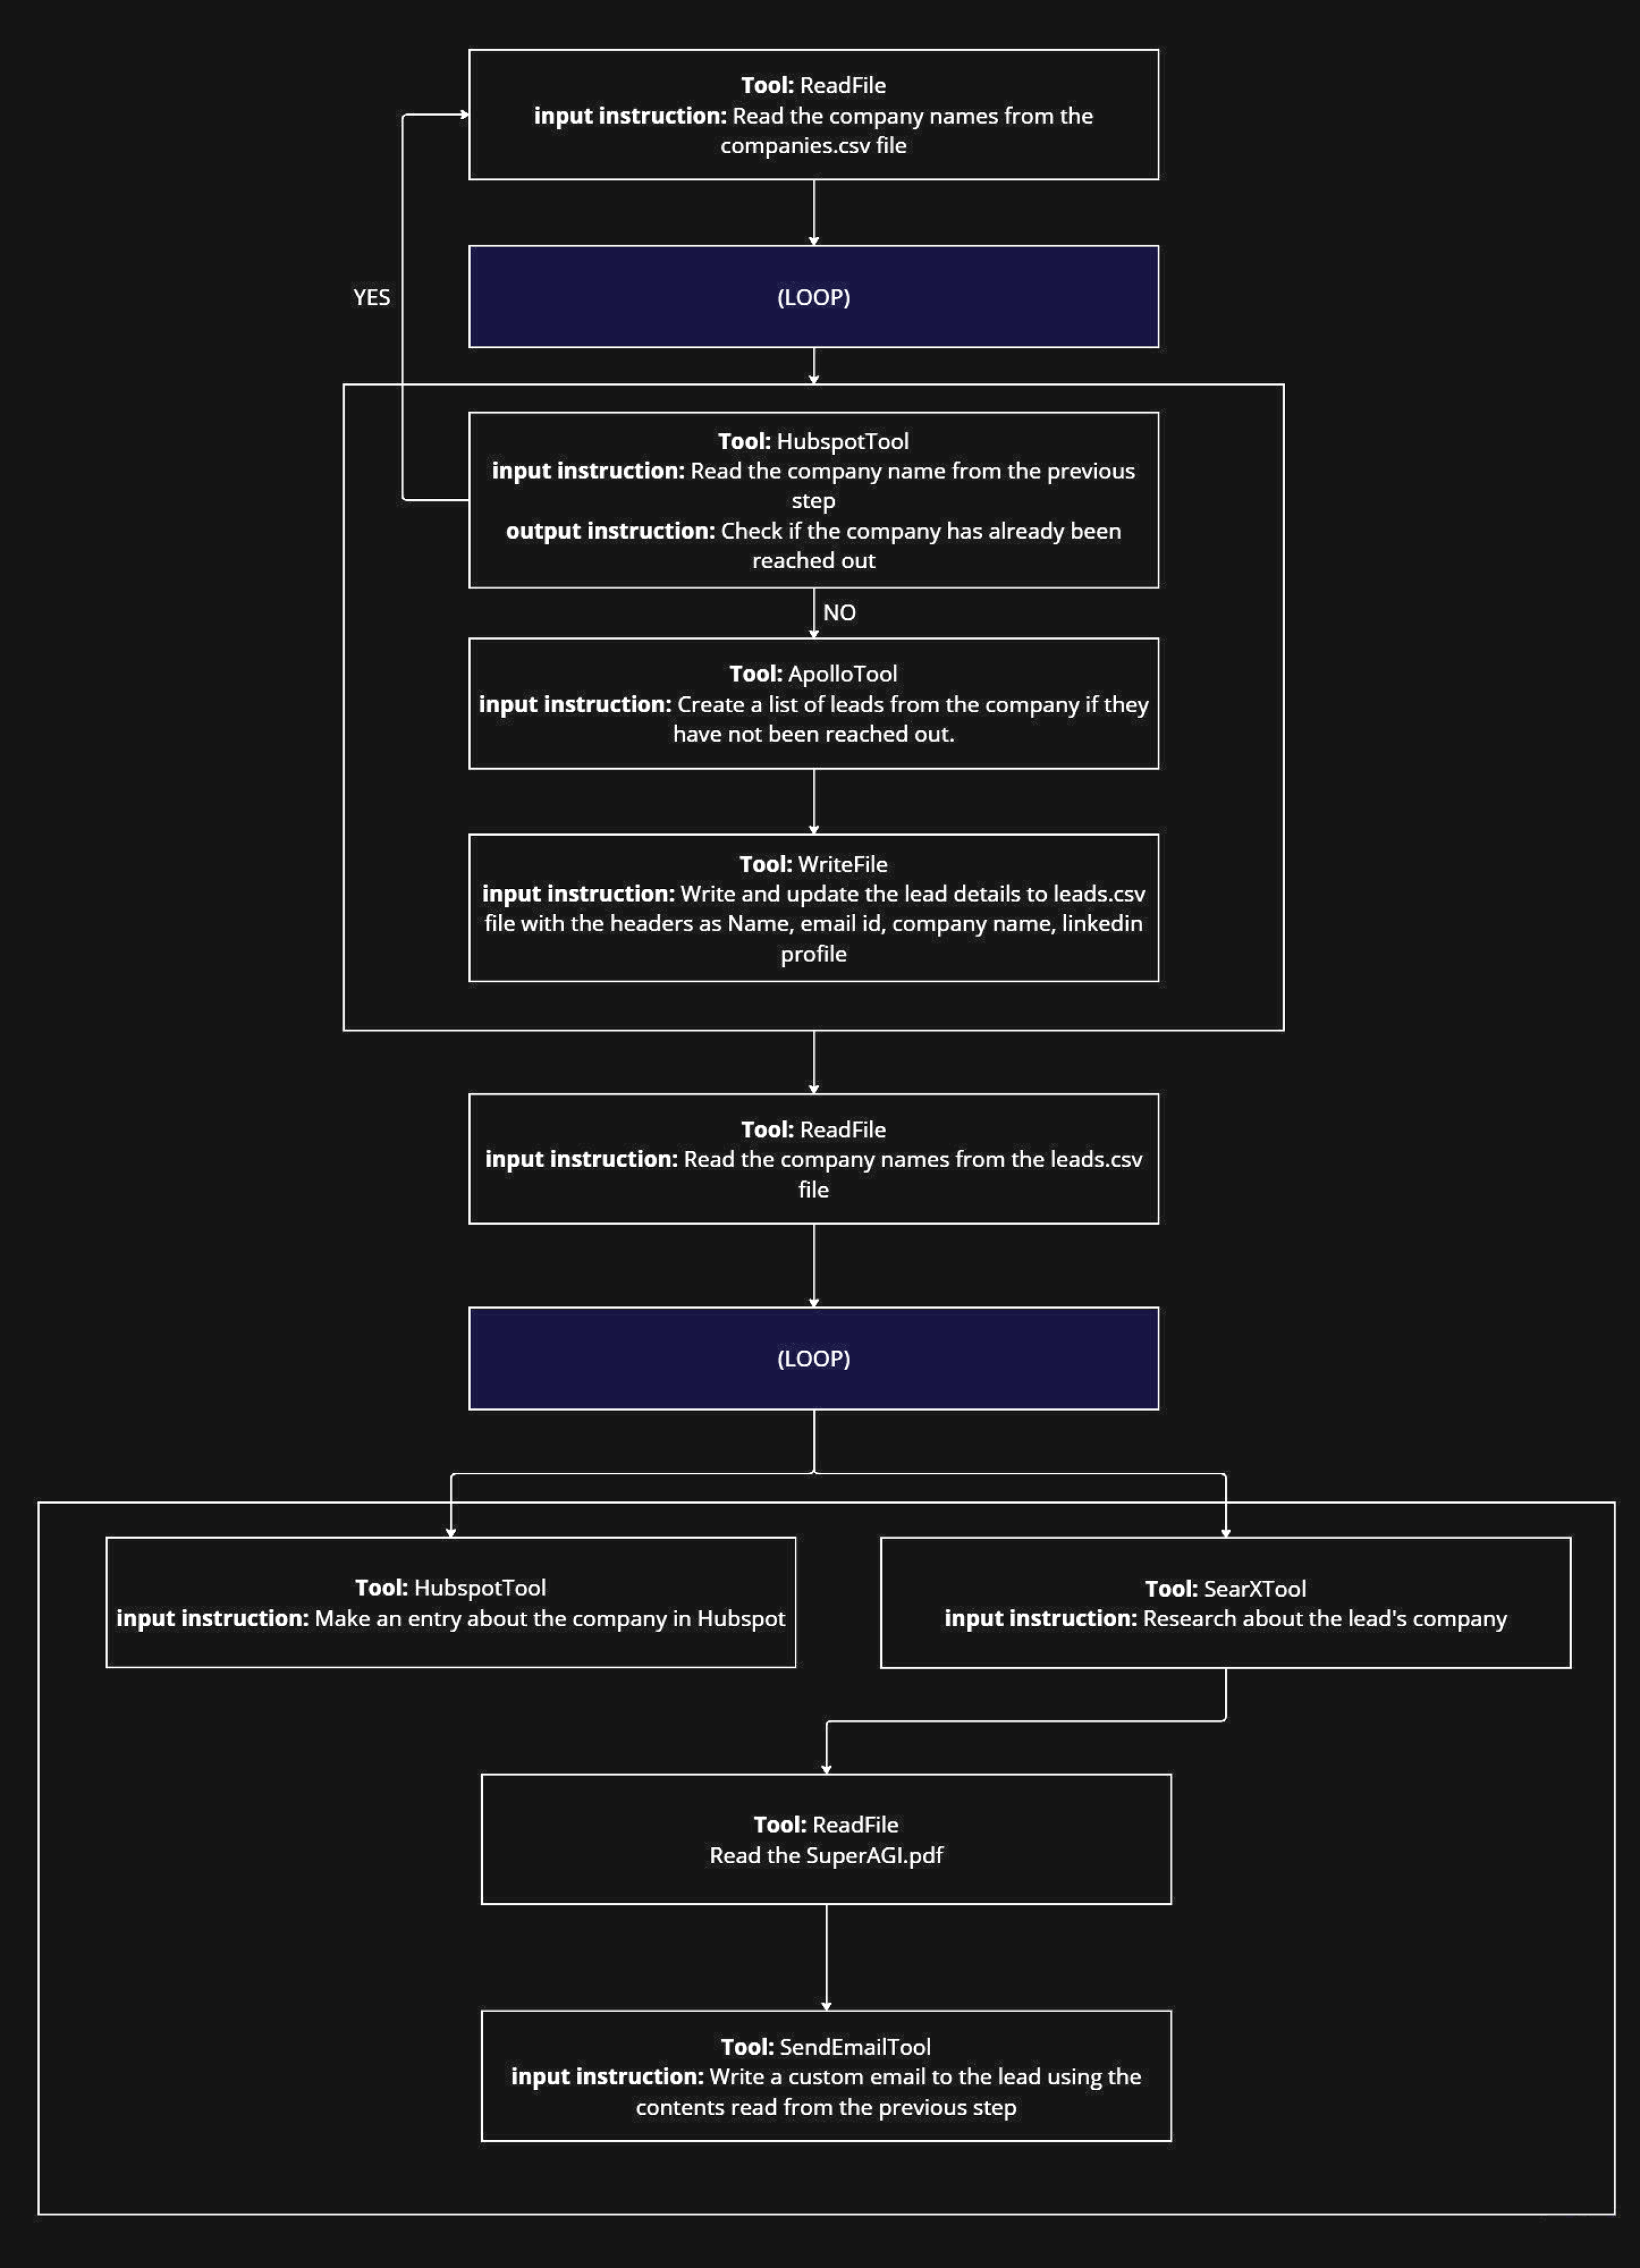
One such example of Agent workflow can be Sales Engagement Workflow. This agent workflow allows AI agents to act as an SDR/BDR for mining prospects’ data and then drafting a personalized cold reach-out message to engage with them. Following the below steps:
- Filter potential prospects using apollo.io and save it as a CSV containing the prospect name, LinkedIn profile, email & company name
- Read the prospect’s data from the CSV generated or manually uploaded via the resource manager
- Research about each prospect’s company
- Draft a highly personalized email using the outputs from the research
- Sends the email to the respective email ID
- Repeat the process for each row in the CSV in a loop

Another example of agent workflow can be HR and Talent Acquisition Workflow – This workflow can autonomously analyse the CVs (pulled from a source or manually uploaded via resource manager), compare them with the Job description, shortlist the candidates, and draft a confirmation message to the candidates.
Similarly, More such Agent workflows can be built to autonomously execute various business processes including Marketing Operations, Customer Support, Data Analysis and many more…
Creating Your Custom Agent Workflow
One can easily create an agent workflow by making changes to the workflow_seed.py and main.py files in the SuperAGI repository. There are four key aspects to creating an agent workflow:
input_instruction: Defines what each step is intended for.output_instruction: Defines the outcome of each step.TASK_QUEUE: Enables looping in the workflows.WAIT_FOR_PERMISSION: Asks for approval and feedback from the user.
For every step in the workflow, the previous step’s output acts as the input for the current step.
Step-by-step Guide
- Clone the SuperAGI GitHub repository and navigate to the
superagi/agent/workflow_seed.pyfile.
- Set up your workflow’s method name and define the workflow name in the parameters in the method.
- Assign step numbers at both places as shown; these are the identifiers of the steps.
- Use
step_type="TRIGGER"to identify the first workflow step. Make sure to include only one trigger in a workflow. - Define the tool that you want to use in the workflow steps. The tool name should match what’s defined in the BaseTool class.

- To use the
TASK_QUEUE, you don’t need to make any changes to the tool name and input instructions. The looping works when the previous step gives an array of items and you want to run a particular flow on each item. - Use the
WAIT_FOR_PERMISSIONto change the input instruction as the permission question you want to see in the console. - Define all the required workflow steps via the code.
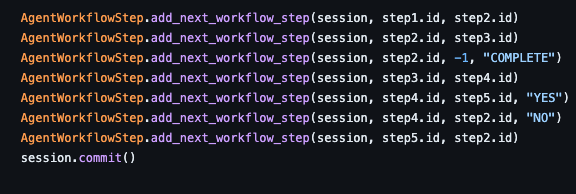
- Connect the steps using the code shown below. Define what step comes after what step, and which step to go to based on the permission.

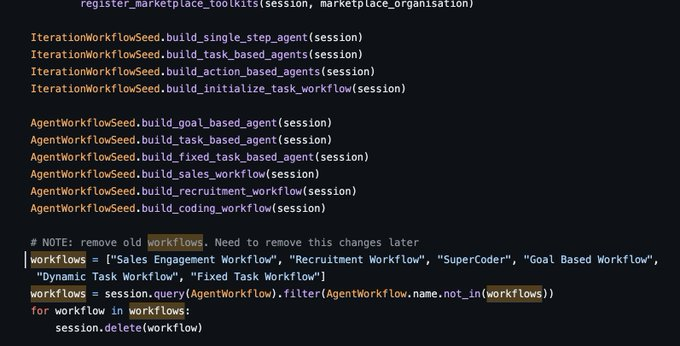
After making the changes in workflow_seed.py, navigate to main.py in the SuperAGI folder and add the created workflow’s method name.

With this, one should be able to see their agent workflow in the dropdown at the time of agent provisioning in SuperAGI.
Currently, Custom Workflows can only be created through code, but SuperAGI is exploring options to include a workflow builder in the GUI soon.


